

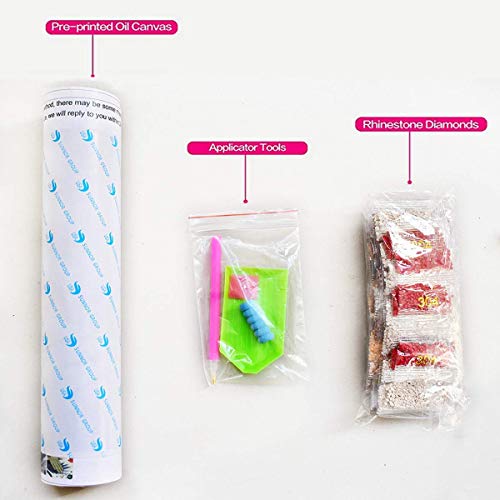


Size:20x12 inch / 50x30 cm  |  Color:style 4 DIY diamond painting is the new popular products. It is beautiful what you see in the picture, very shining and amazing. Production process is simple that you can spend less time to complete. Simply hung it onto the wall, it will make your room and your world amazing. It is exquisite to give to friends and loved ones to express good wishes to share. DIY Diamond painting production steps: DIY painting production steps: 1. Open the box and check the diamond draw special tools 2. View the resin diamond color, arranged in order of coding 3. Uncover tape drawing above, you will see a lot of symbols corresponding to the color coding 4. According to the corresponding color coded clamp the corresponding the resin inlaid diamonds 5. Suggested that one type of the resin diamond one set completed faster 6. In order to create a perfect diamond painting, drawings put together in one place every row symbols do not have to stay stuck diamonds 7. To cut a good figure on the drawings hold sorted array mounted to the plane of the material above 8. Splices need flat against the neat, do not have cracks 9. after a good fight, the rest of the gap at the glue corresponding symbols of diamonds 10. To complete a good diamond drawing, put it in your selection of a suitable framework Tips: 1. NOTE: The product not included the frame. It is just a rolled canvas. Try to make the kids leave the diamonds can be easily accessible place. Avoid being swallowed 2. Drawing need to be kept clean. If there is dirt adhesion can influence them with low-temperature solid iron. 3. Diamonds to remain sticky gum tightness.
Trustpilot
3 weeks ago
2 weeks ago
